Introduction
야기서는 Vivado에서 Implementation이 끝난 후, 원하는 Net의 Net delay를 확인하는 방법에 대하여 알아보겠습니다.
Vivado GUI를 사용하여 원하는 Net의 Net Delay Value를 확인하는 방법 그리고
Vivado TCL Console를 사용하여 원하는 Net의 Net Delay Value를 확인하는 방법
이렇게 두 가지 방법을 알아보겠습니다.
Test를 위한 PC 사용환경은 다음과 같습니다.
- OS : Windows 10 pro ( version : 21H2 )
- Vivado version : 2022.1
Example Design Download & Open Project
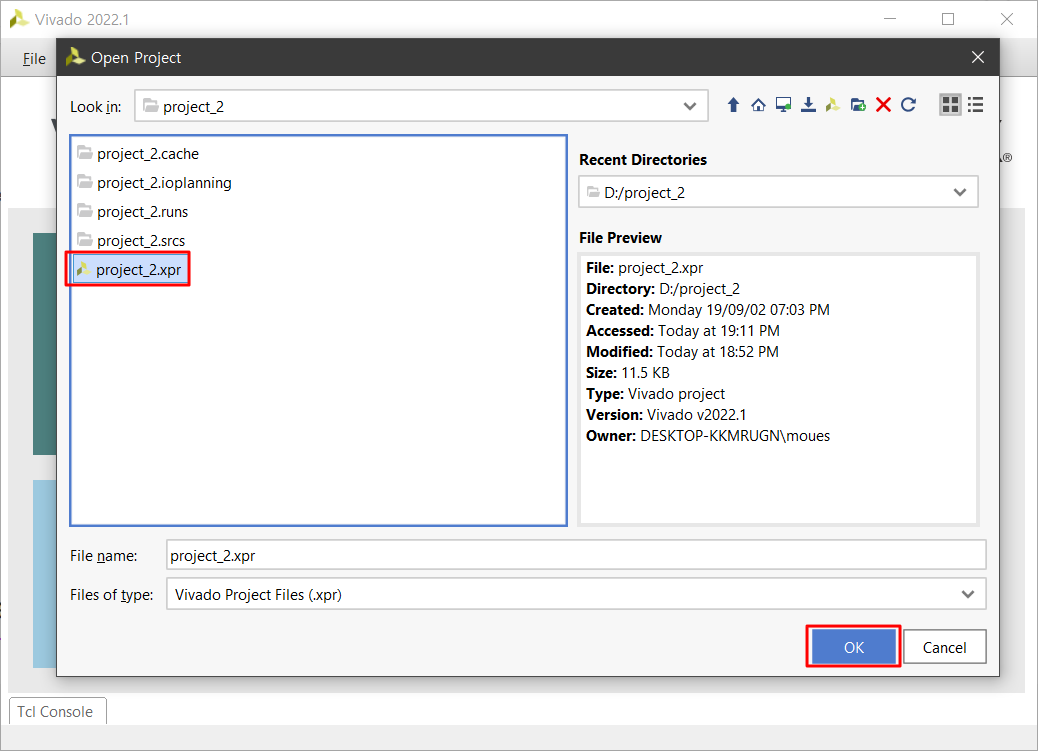
1.
아래의 ZIP file을 download 받은 후, 압축을 풉니다.
2.
Vivado 2022.1에서 "project_2.xpr"파일을 Open Project 합니다.
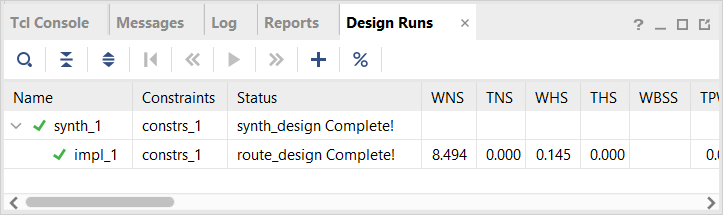
3.
Run Implementation 까지 진행합니다.
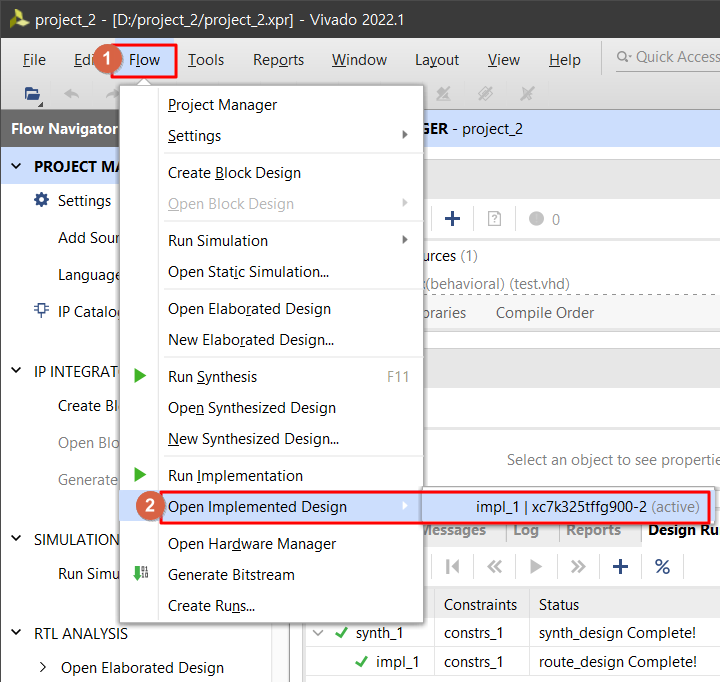
4.
Open lmpelementation Design을 실행합니다.
How to get the Net delay on Vivado GUI
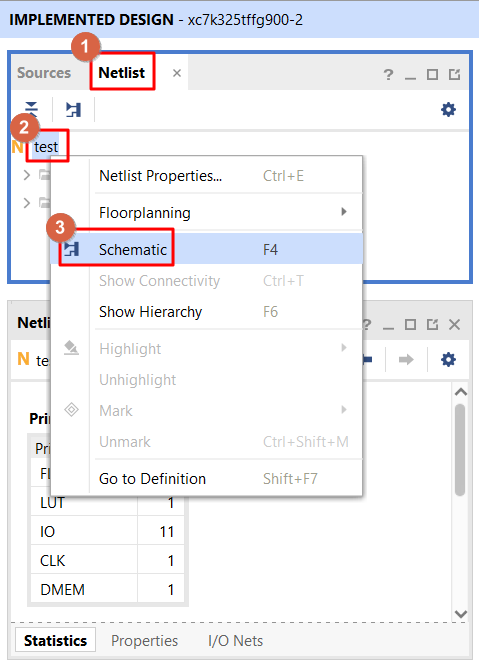
1.
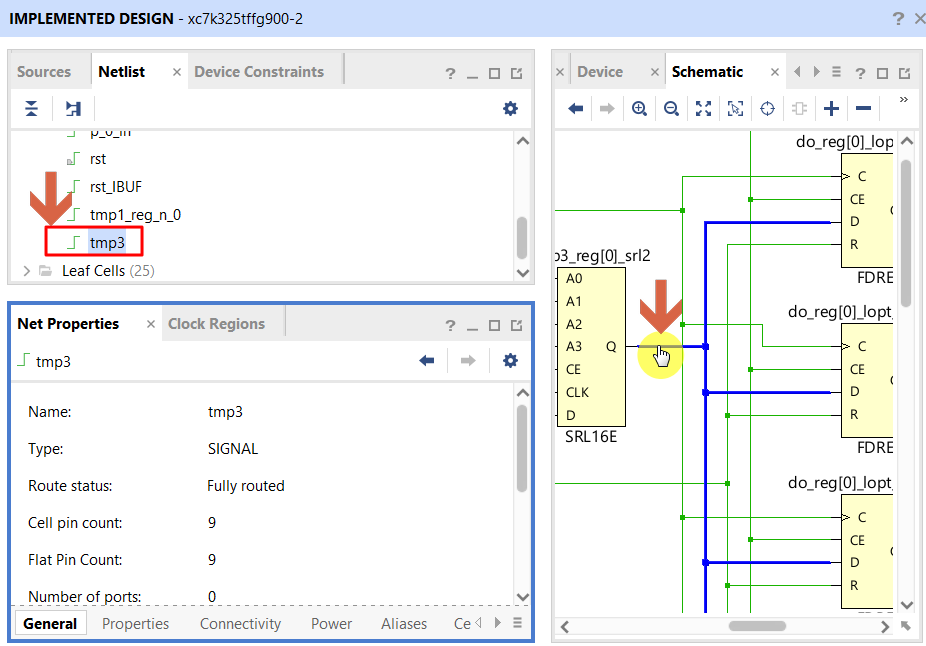
Open Implementation Design에서 아래의 화면과 같이 Schematic을 클릭합니다.
2.
"Netlist" 윈도우 혹은 "Schematic" 윈도우에서 원하는 Net를 클릭합니다.
(여기서는 tmp3를 선택합니다.)
3.
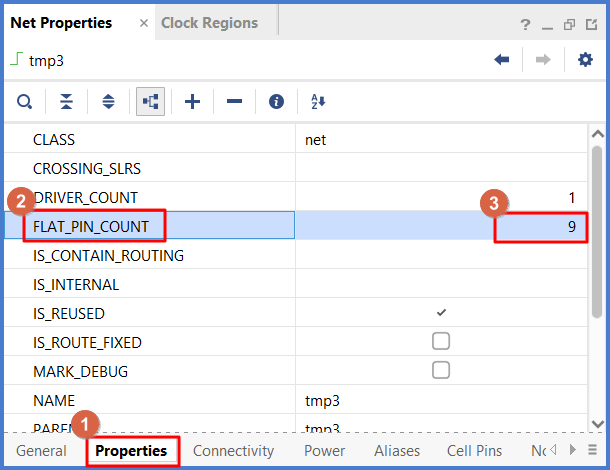
"tmp3" Net를 클릭한 후, "Net Properties' 윈도우에서 "Properties" 탭을 클릭합니다.
그리고 "FLAT_PIN_COUNT"이 9라는 값을 가지는 것을 확인할 수 있습니다.
"tmp3" Net의 Fanout은 (9 - 1) = 8 입니다.
4.
아래와 같이 "tmp3" Net를 클릭한 후, "Net Properties' 윈도우에서 "Connectivity" 탭을 클릭합니다, 그리고 "Load Net Delay" 버튼을 클릭합니다.
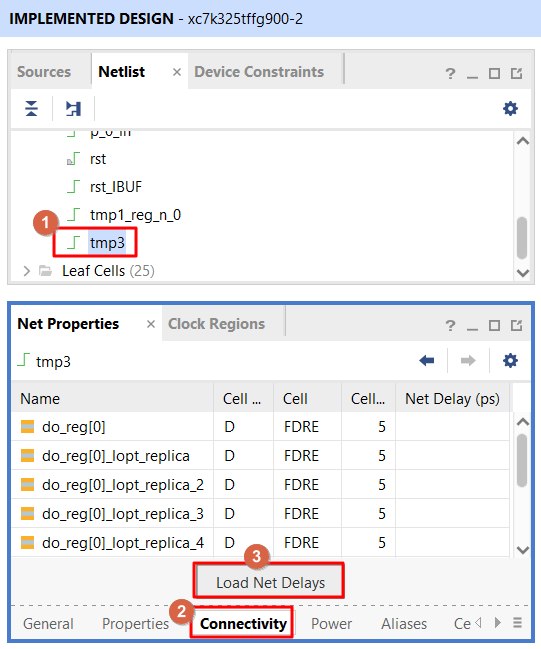
5.
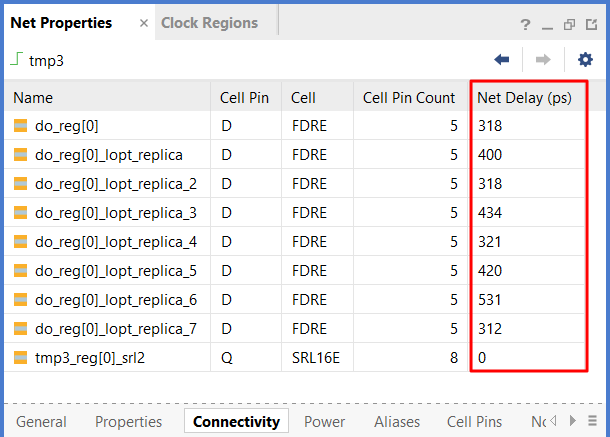
"Load Net Delay" 버튼을 클릭하면 아래의 화면과 같이 8개 Fanout의 Net Delay 값이 표시됩니다.
이와 같이 Vivado GUI를 사용하여 원하는 Net의 Net Delay Value를 확인할 수 있습니다.
How to get the Net delay on Vivado TCL console
1.
Open Implementation Design의 Vivado TCL console에서 다음과 같이 기입한 후, 엔터를 하면 "tmp3" Net가 가지고 있는 Fanout의 값을 알 수 있습니다.
(아래의 fanout은 변수명입니다.)
set fanout [ get_property FLAT_PIN_COUNT [ get_nets tmp3 ] ]

"tmp3" Net의 Fanout은 (9 - 1) = 8 입니다.
2.
Vivado TCL console에서 다음과 같이 기입한 후, 엔터를 하면 "tmp3" Net가 가지고 있는 8 Fanout의 Net Delay 값을 알 수 있습니다. (아래의 net_delays은 변수명입니다.)
이와 같이 Vivado TCL Console를 사용하여 원하는 Net의 Net Delay Value를 확인할 수 있습니다.
set net_delays [ get_net_delays -of_objects [ get_nets tmp3 ] ]
report_property [ lindex $net_delays 0 ]
report_property [ lindex $net_delays 1 ]
report_property [ lindex $net_delays 2 ]
report_property [ lindex $net_delays 3 ]
report_property [ lindex $net_delays 4 ]
report_property [ lindex $net_delays 5 ]
report_property [ lindex $net_delays 6 ]
report_property [ lindex $net_delays 7 ]
3.
다음과 같이 확인된 Net delay value를 TXT file에 저장할 수도 있습니다.
report_property [ lindex [ get_net_delays -of_objects [ get_nets tmp3 ] ] 0 ] -file D:/my_file0.txt
이와 같이 TCL language를 이용하여 다양한 방법을 활용할 수 있습니다.
지금까지 Vivado에서 Implementation이 끝난 후, 원하는 Net의 Net delay를 확인하는 방법에 대하여 알아보았습니다.
여러분의 FPGA 설계에 조금이라도 도움이 되었으면 합니다.
오늘도 좋은 하루 되세요.
(공감, 구독, 댓글은 저에게 힘이 됩니다!)
Create Date: July 07, 2022
Posted By: Mouessee
Xilinx 본사는 한국 내에 Corporate and Sales Distributor로 MAKUS를 두고 있습니다.
Xilinx 국내 Corporate and Sales Distributor인 MAKUS는 XIlinx FPGA Device를 기술영업을 통해 판매하며 기술지원이 가능합니다.
MAKUS www.makus.co.kr
관련 BLOG
------------------------------
------------------------------
'Xilinx > Vivado' 카테고리의 다른 글
| My recommended book for "VHDL" or "Verilog" users (0) | 2022.08.11 |
|---|---|
| ILA not triggering at 15 MHz (0) | 2022.08.07 |
| To Add HDL to the Block Design (0) | 2022.08.05 |
| How to set up Non-Xilinx Device on JTAG Chain (0) | 2022.08.02 |
| Vivado ML Edition의 종류와 서로 간의 차이점 및 가격 (0) | 2022.07.05 |